Jupyter will Change your Life
Thu Feb 06 2020
It is not uncommon for me to get exuberantly excited over an open-source project that I stumble upon– Jupyter Lab has taken the cake this month. The Jypyter project extends IPython notebooks to the web browser and added support for multiple languages.
1 Why Notebooks?
As a researcher, I love notebooks because they enable you to easily share your code with others. Notebooks are much more interactive than simply sharing source code because you can mix text(markdown), code, and outputs in code execution. For classes and when working, this makes it very easy to generate quick reports. You can simply write a document that auto generates the graphs and figures you want to talk about in your document.
Last week I worked on a computer vision assignment that required me to use Open CV to manipulate images using filters, convolutions, etc. The entirety of the assignment required me to produce roughly 30 images. A majority of the class wrote python scripts and threw each image they generated into a massive word document. They then added their analysis and submitted their assignment as a PDF alongside a bunch of python scripts. There is nothing wrong with doing that; however, what happens if at the end of the assignment you realized that you were generating Gaussian filters incorrectly? If you wrote everything in a Jupyter notebook you would just have to fix the dubious code and re-run the notebook and it would produce your report in its entirety. But, if you had your scripts as separate files you would have to fix your code and then go through and generate a dozen new images to update your report.
The ability to accurately reproduce your report is pinnacle to making research more verifiable and reproducible. This is something that the R and open-science communities heavily focus on. Directly mixing your code and analysis with your report is very useful when trying to explain things un-ambiguously. Consider if the data that you are working with changes halfway through writing your research report. With a notebook, you would just have to re-run the notebook where if you had the report as a separate word or Latex file, you now run the risk of misreporting your results.
2 Jupyter Notebook
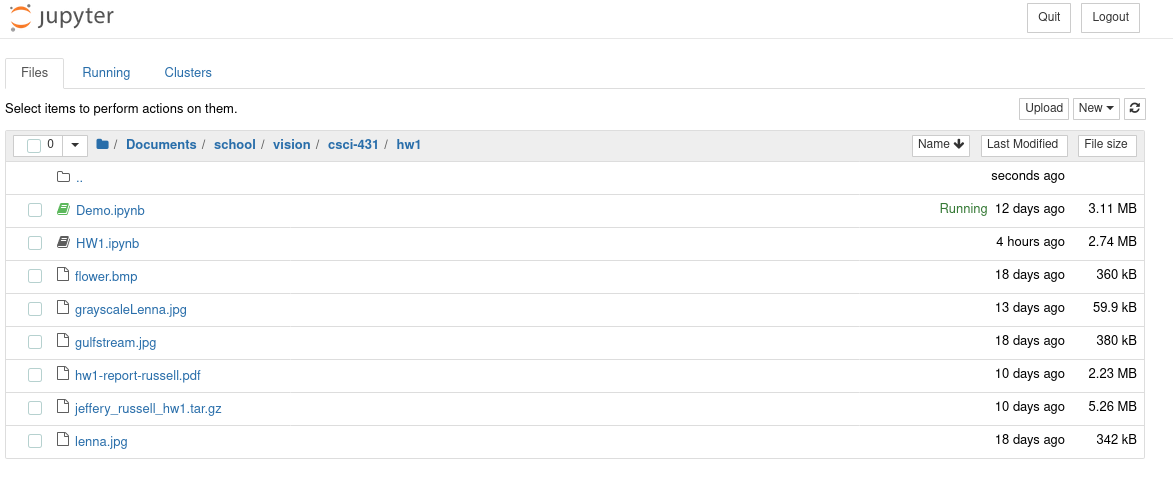
When you run a Jupyter notebook it starts a new server and launches you into your native web browser. From your web browser, you can view files in your current directory and choose one to edit. The one that you pick will open in a new window.

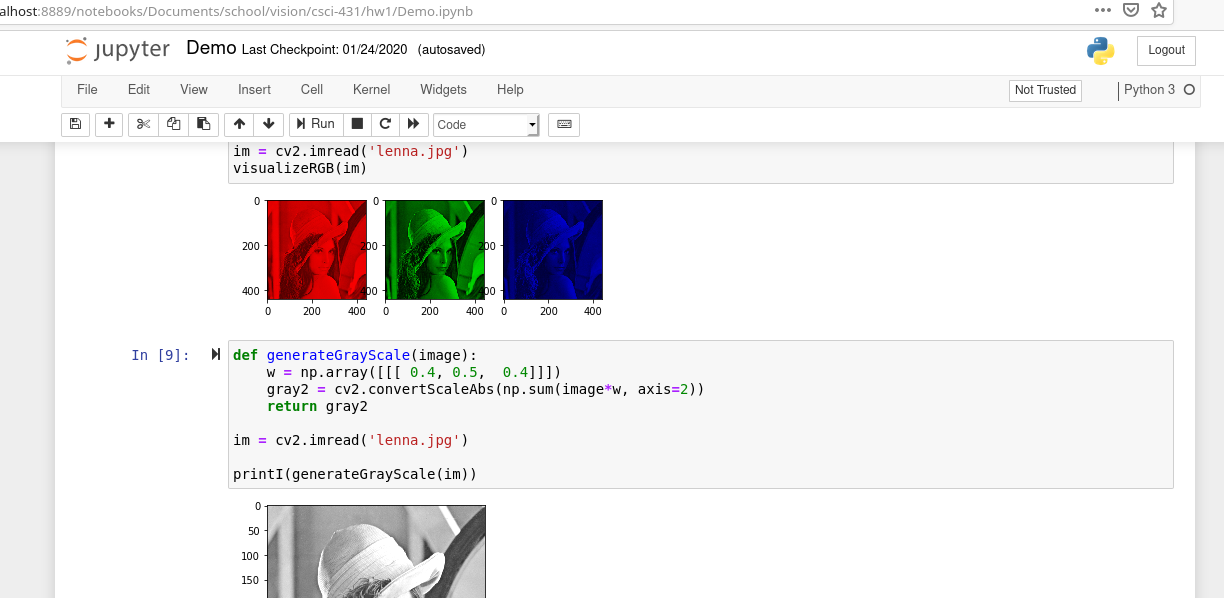
In this notebook preview, you can add snippets. Each snippet can be either code, markdown or raw text. You can run snippets or rearrange them however you please.
The concepts of snippets introduce the final and most compelling reason to use notebooks. Although you should be able to execute your notebook by running all snippets sequentially, you don’t have to follow that order. Plus, the results of running snippets are saved in your “workspace” between runs. This means that you don’t have to always re-compute your costly computations between each programming session. This enables you to load a large dataset, run complex computations, store the results in a variable and then access that variable the next day. This enables quick R&D because in a traditional setting you would consider building out infrastructure like databases to store your temporary computations.

3 Jupyter Lab
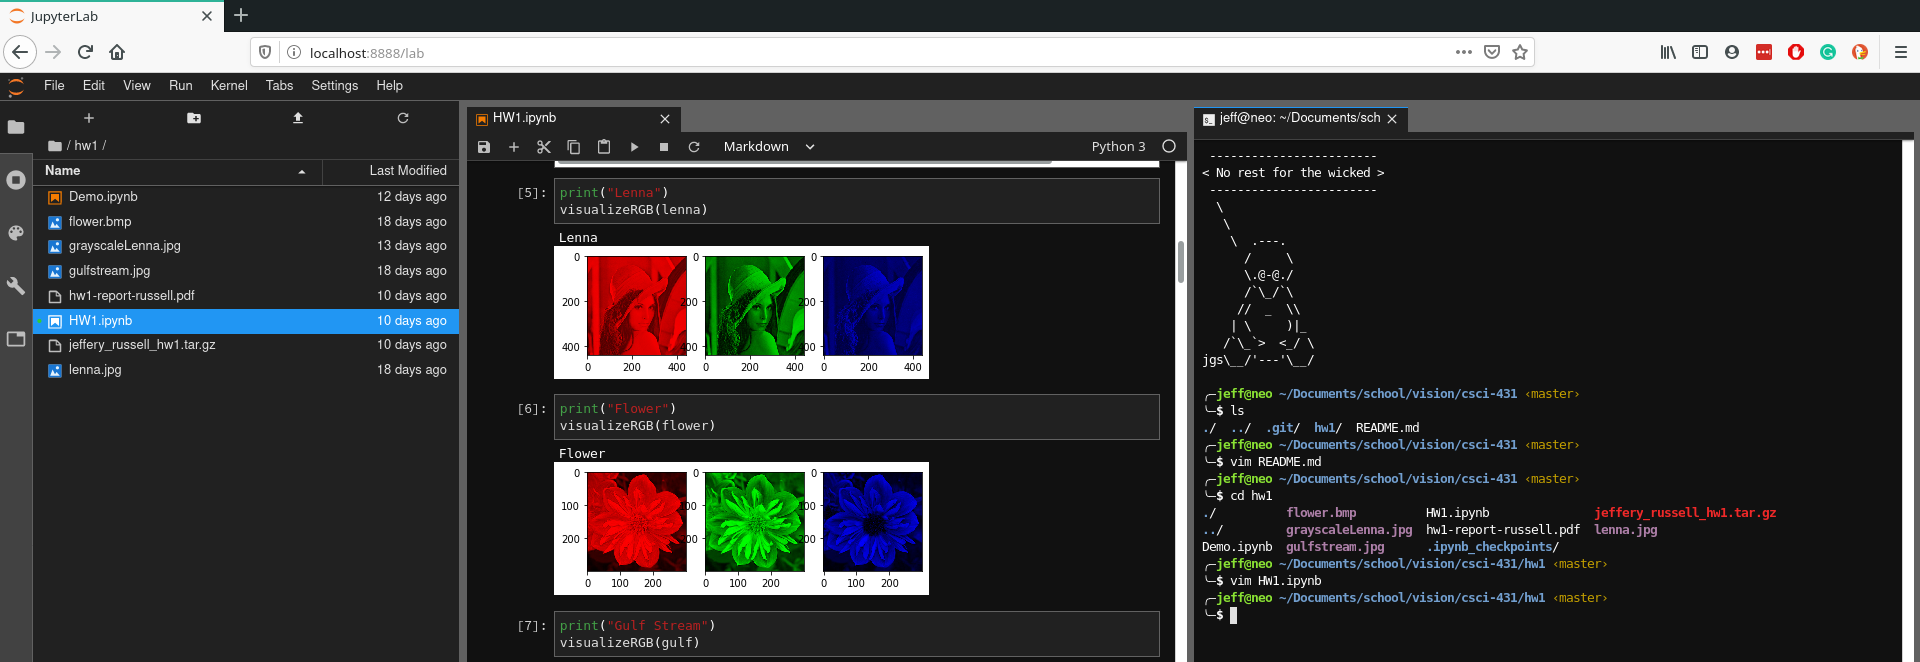
Although notebooks have been around for quite some time, I got hooked on Jupyter because it brings the entire ecosystem together very nicely. With Jupyter notebook, you could only have one notebook open in a single web browser tab. If you wanted multiple notebooks, you had to open multiple windows. Jupyter Lab has a built in window manager enabling you to view files, notebooks, terminals, and other file formats all in the same internet browser tab!
In case you missed it, in Jupyter lab you can launch terminals! This is important for a development framework to have because it enables you to run any program that is on your computer. I find this particularly useful when I am running Jupyter Lab on a remote computer and I want to use git.
Jupyter Lab also has a built-in light and dark theme you can use.


4 Running and Installing
Since the instructions will probably change, I’m just going to link to the the website where you can install Jupyter lab from:
https://jupyter.org/install.html
The installation is essentially just a pip install command.
pip install jupyterlabRunning Jupyter lab is also a single command:
jupyter lab5 Running for remote use
Imagine that you are running an old computer and you simply want your code to run on a remote computer that has a beefier GPU for ML. With Jupyter Lab or Notebook you can do that, but, it takes a little trickery. The easiest solution that I found involves using a reverse SSH proxy.

The first thing that you want to do is set up a password so that you can connect to the Jupyter lab instance using a password rather than using an authentication key that gets hidden in the terminal.
jupyter notebook password** note ** the password that you set is configured in the same config used by both Jupyter lab and Jupyter notebook.
The next thing you should do is run the Jupyter lab instance on the port that you want it to listen to.
jupyter lab --no-browser --port=6000The “–no-browser” will prevent Jupyter from opening in your default web browser.
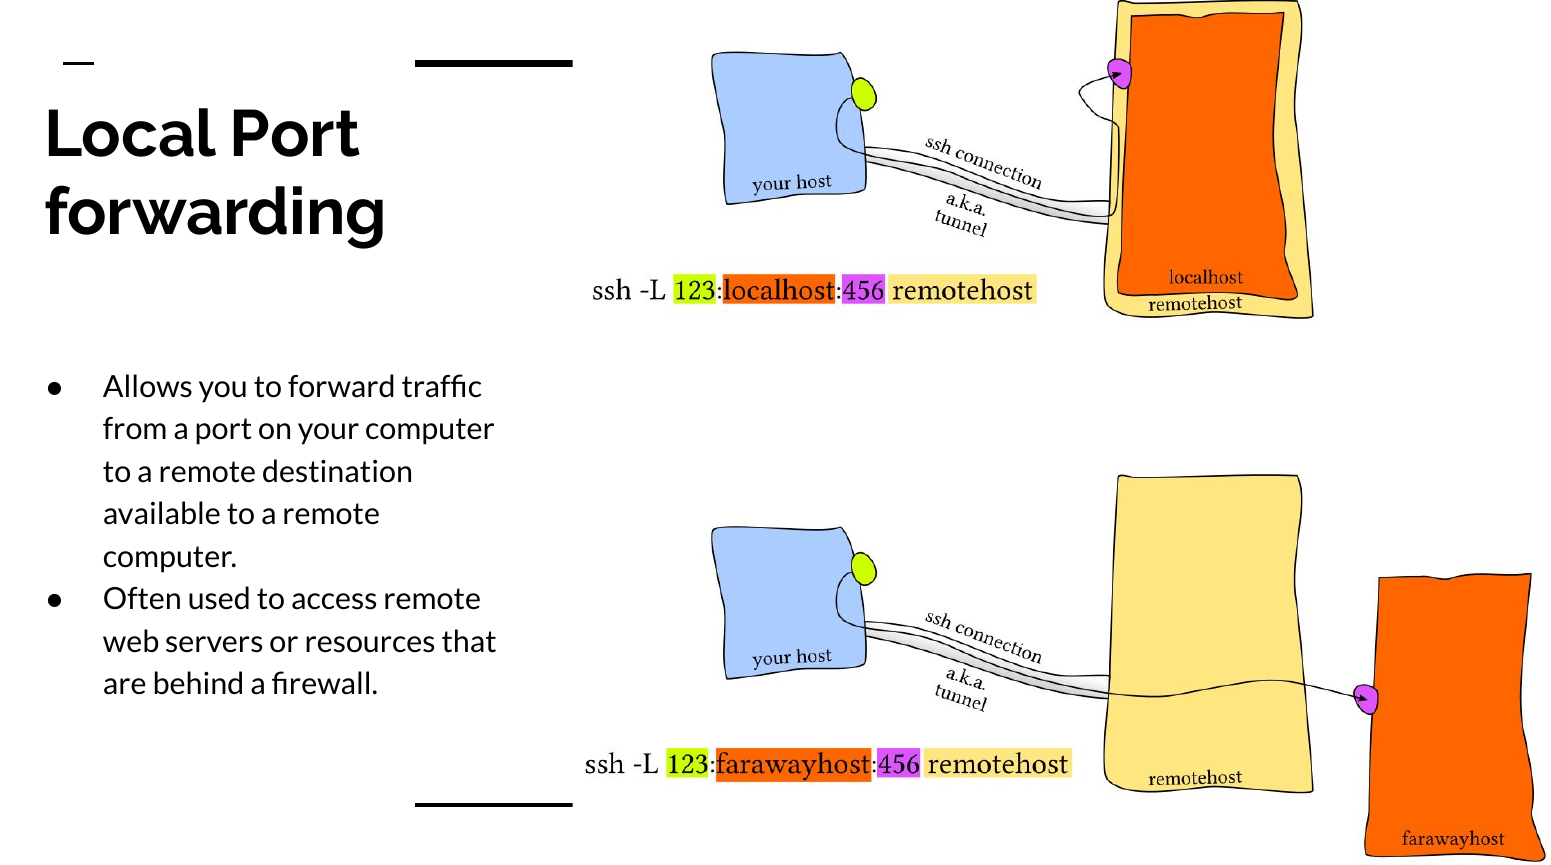
The next step is to do a local SSH port forward on your machine so you can access the Jupyter instance on the remote server. The benefit of doing this is that you can get behind firewalls and that all your traffic is encrypted.

The image above comes from my presentation on “Everything SSH”. The essence of the command bellow is that you will forward all connections on your machines to port 6000 to a remote server’s connection to localhost:6000.
ssh -L 6000:localhost:6000 user@some-remote-host.rit.eduAfter you run that command you can access the Jupyter lab instance by opening your favorite web client and going to localhost:6000. Typing that command every time is tedious so I recommend that you alias it in your shells config file.
alias jj="ssh -L 6000:localhost:6000 user@some-remote-host.rit.edu"Now all you have to type in your command prompt is “jj” to connect to your remote Jupyter server. Neat.
But, what if your roommate trips and your server gets restarted? Well, you can write a systemd script to automatically start your Jupyter server when the computer boots. This is what my system d script looks like.
# location /lib/systemd/system
#
# After file creation run: systemctl daemon-reload
# enable service on start up: systemctl enable jupyter-lab
# start the service: systemctl start jupyter-lab

[Unit]
Description=Script to start jupyter lab
Documentation=https://jrtechs.net
After=network.target

[Service]
Type=simple
User=jeff
WorkingDirectory=/home/jeff/Documents/school/csci-431/
ExecStart=/usr/local/bin/jupyter lab --no-browser --port=6969
Restart=on-failure

[Install]
WantedBy=multi-user.target
You want to set the working directory to be the location where your Jupyter notebooks are stored. You also want to make sure that you specify the absolute path to the Jupyter binary in the execstart parameter. You can find that using the which command:
which jupyter6 Conclusion
If you do any data science or educational python I would strongly recommend that you check out the Jupyter project. If you want multiple users to connect to the same Jupyter server, they have a project called Jupyter Hub that would manage all that.
Recent Posts
The Data Spotify Collected On Me Over Ten YearsVisualizing Fitbit GPS Data
Running a Minecraft Server With Docker
DIY Video Hosting Server
Running Scala Code in Docker
Quadtree Animations with Matplotlib
2020 in Review
Segmenting Images With Quadtrees
Implementing a Quadtree in Python
Parallel Java Performance Overview